Baum-kuchen studio wax seal from Baum-Kuchen on Vimeo.
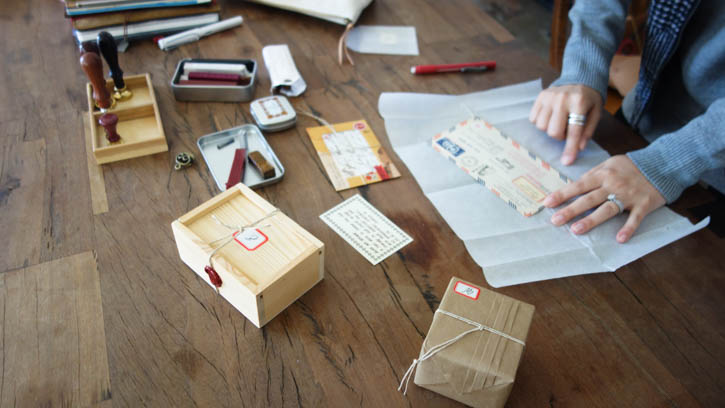
We recently had a wax seal party at our studio! Well... it was Nerine and me learning about wax seal from Eunice and getting totally psyched about using wax seal on everything everywhere!
Before I had this little session with Eunice, I felt pretty intimidated by the idea of wax seal so I was grateful that she broke things down in easy steps and showed us tons of different ways to use wax seal in today's analogue world!
We are designing our Baum-kuchen original wax seal stamp for very very near future... and can't be thrilled more! For now.... I hope this visual story will get your creative juice going!
We are designing our Baum-kuchen original wax seal stamp for very very near future... and can't be thrilled more! For now.... I hope this visual story will get your creative juice going!
Here is a little introduction by Eunice followed by process images and ideas on how to use wax seal in today's analogue world.
A LITTLE HISTORY/.
The first usage of seals can be traced back to some of the earliest known civilizations of man. Some seals have been found from as early as the Indus Valley and Mesopotamia civilizations. The very first seals were made from clay and impressed using rings or cylinders.
The usage of “wax” in seals did not take place until the Middle Ages by only eminent individuals such as bishops, monarchs and royal spokespeople to authenticate documents, by the 13th century wax seals became more widespread and were being used by monasteries, guilds, aristocrats and eventually common folk.
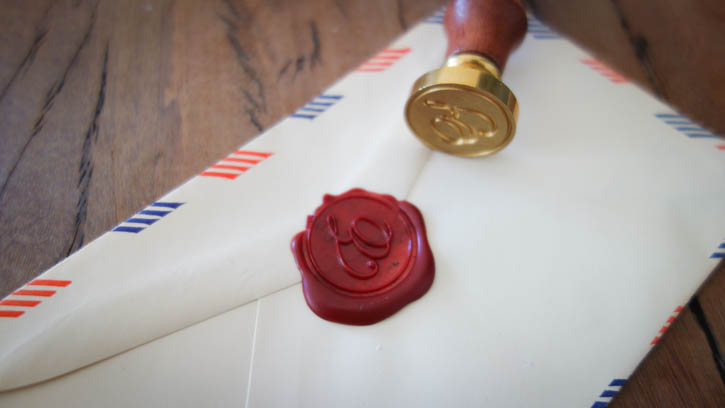
Each seal would be very unique to its owner and would often be used in place of a signature due to widespread illiteracy during the 13th century. Wax seals were occasionally stamped directly onto a document, but later became more common for them to be stamped separately and then affixed to the bottom of the document with a ribbon, cord or strip of parchment.
The traditional type of wax used to seal documents during the middle ages were composed of a resin and wax mixture which became very hard upon sealing. This type of “hard” wax was used during the middle ages for authenticity and confidentiality, as when one tried to peel open the seal, it would crack into pieces to ensure it had not been tampered with.
Sealing letters and documents are a historical by-gone which may seem outdated, however, the distinguished and romantic history of that era is the very fact as to why they are now so appealing in the modern century. Anyone who has had the pleasure of receiving a letter or card with a unique seal can attest to the excitement that comes with opening it…
QUICK TIPS AND TECHNIQUES /.
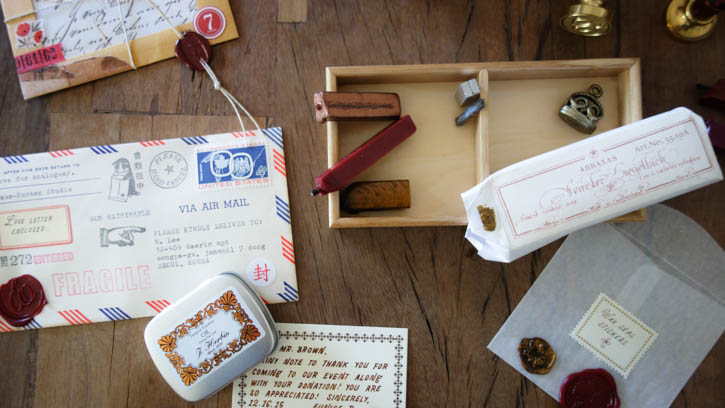
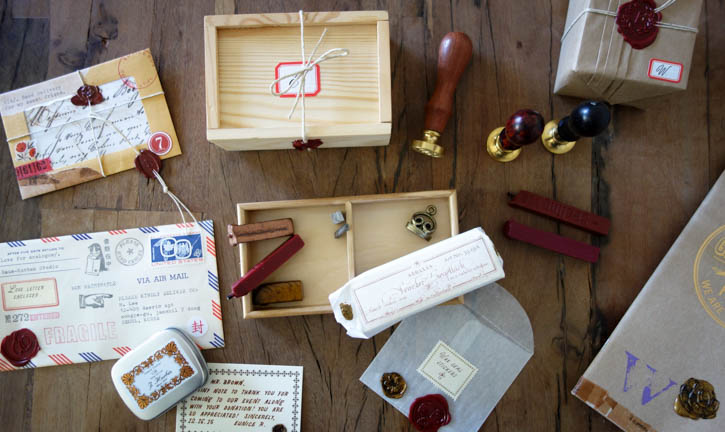
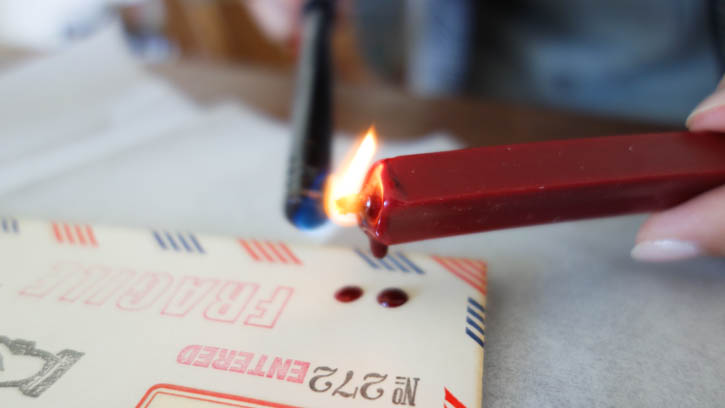
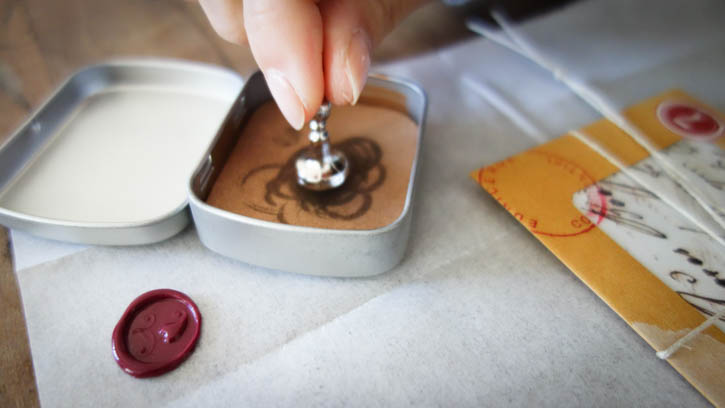
+ Parchment paper is your best friend. It is not necessary but will make the job much easier. Have one small sheet of parchment paper to cover your “working area” where you will be doing the wax seal. The parchment paper will serve as a space where you can safely drop your wax stick as soon as you are done letting the wax drip onto your desired area.
+ The parchment paper not only will protect your working area but can be used to adhere wax to string so it can easily be removed to either make a wax seal charm on a letter, or even wax seal stickers!
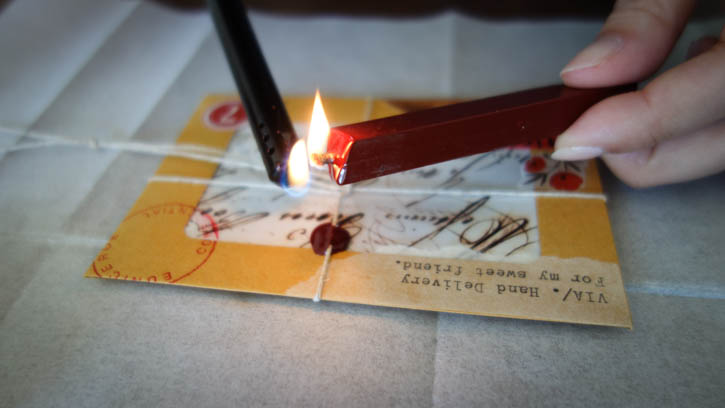
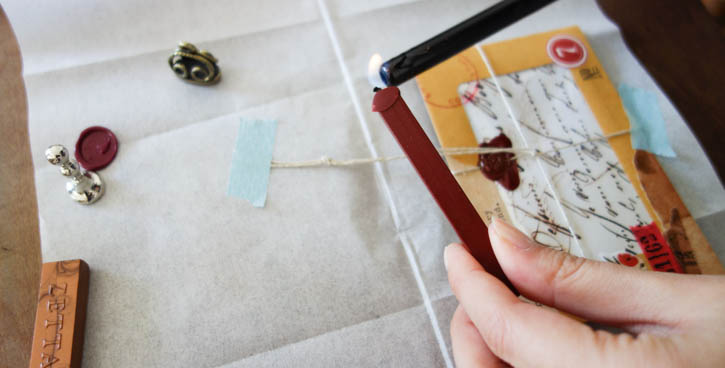
+ A wicked wax seal may seem more convenient however; the wax will drip very slowly. By the time you are done, parts of the wax you have put onto your desired surface may already have hardened. In order to avoid this, instead of letting the lit part of the wick do the job on its own, have a long lighter in hand with the flame under the wax seal to help expedite the wax melting process.
+ Some types of wax can be stickier than others. Should you find that you are having issues with the wax adhering to your seal like chewing gum, it is advisable to have a damp paper towel on hand where you can lightly moisten the surface of your wax seal before dipping it into your puddle of freshly melted wax.
+ Modern day wax composed of a bees wax mixture can be safely sent via snail-mail without issues as long as your wax seal is not very thick. However, just to be on the safe side it is recommended that you write or stamp “non-machinable” on the envelope and ask your post officer to “hand cancel” the postage. It will cost you a few cents more to send it this way but will protect your mail art from getting damaged.
SOURCES /.
Wax Seals
Modern Flexible Sealing Wax
Traditional Hard Sealing Wax
Wax Seal Embellishments
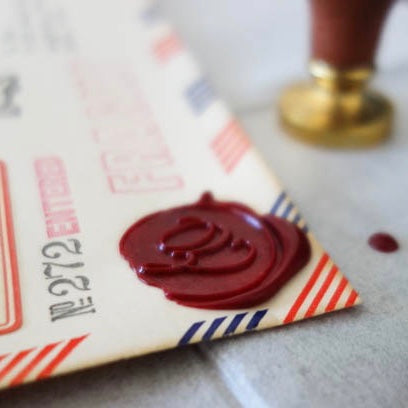
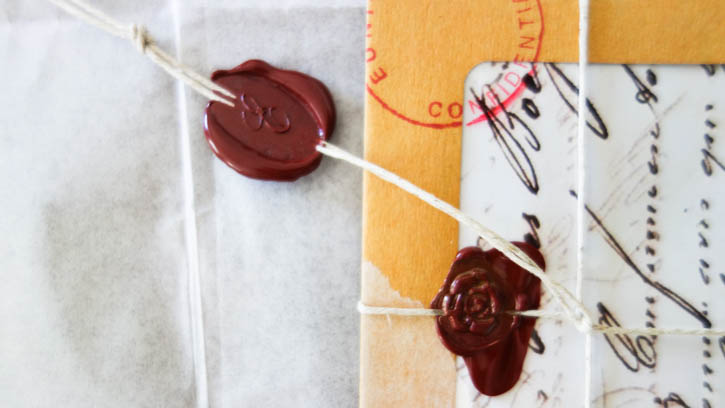
1. Add a unique character to your snail mail
Make sure to use softer wax mixture (bees wax mixture) when you are mailing the envelope with wax seal. Also stamp "non-machinable" on the envelope and ask your post officer to "hand cancel" the postage! You can use the wax seal as a decorative purpose or actually seal the envelope.


2. Make it shine!
You can use Wax Seal Embellishments to add little sparkles to your seal. Just tap your wax seal stamp on the pad with Wax Seal Embellishments before you use it for sealing. We noticed that the gold embellishment came out more vividly when it was used with a lighter color wax.
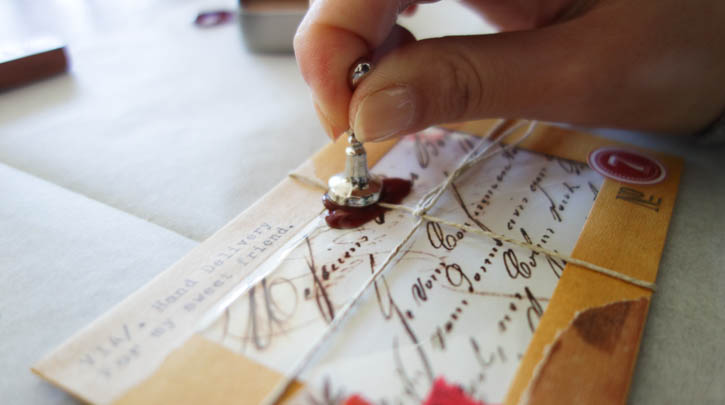
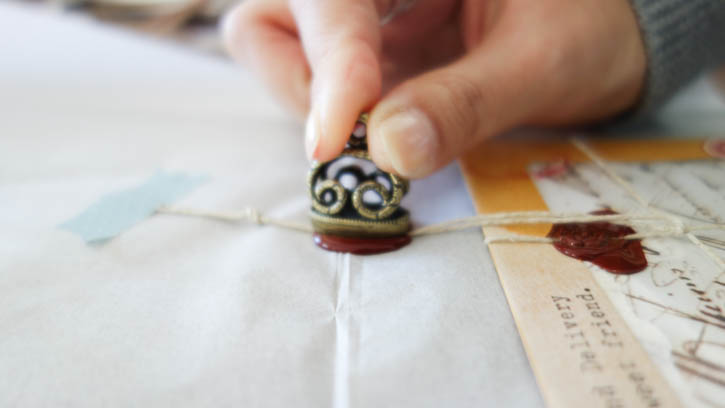
3. Seal a twine
You can also use the wax stamp to seal a twine or tied knot. I love how different textures come together to create a beautiful analogue artifact.
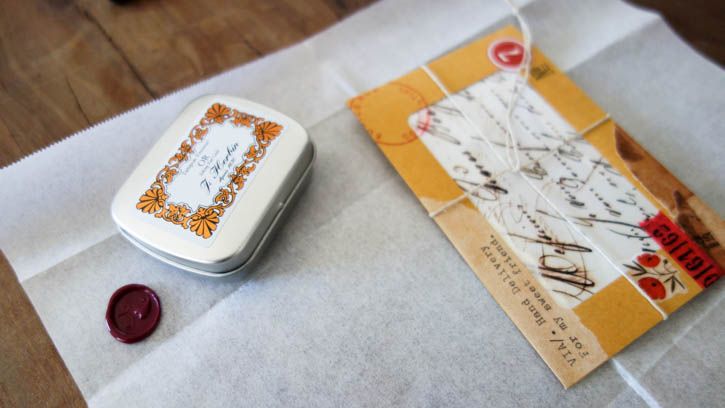

4. Make a wax charm
You can create a custom charm by adding a wax seal to a string. Tape a string on a parchment sheet to make a mini workspace for the wax seal to harden!

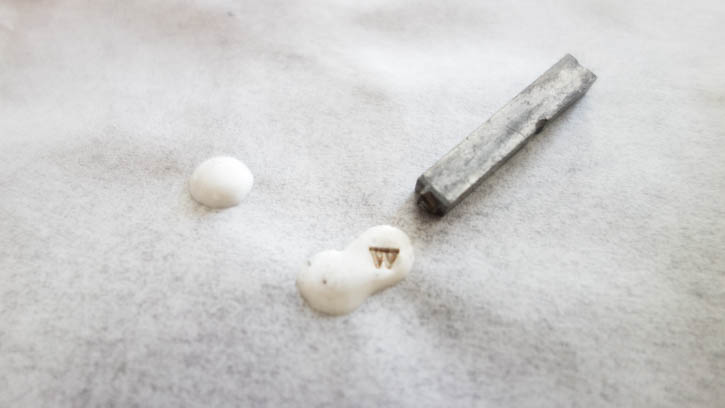
5. You can use different artifacts as wax stamps!
Did you know that you don't have to use an actual wax stamp to create a seal? Anything metal that can create a unique impression could work as a template for your seal.

6. Wax seal sticker
Create wax seals on parchment sheet. Once seals cool down, you can easily peel them off and keep them as wax seal stickers for future use! We used double sided tape to add the wax seal sticker to our notebook and it worked seamlessly!

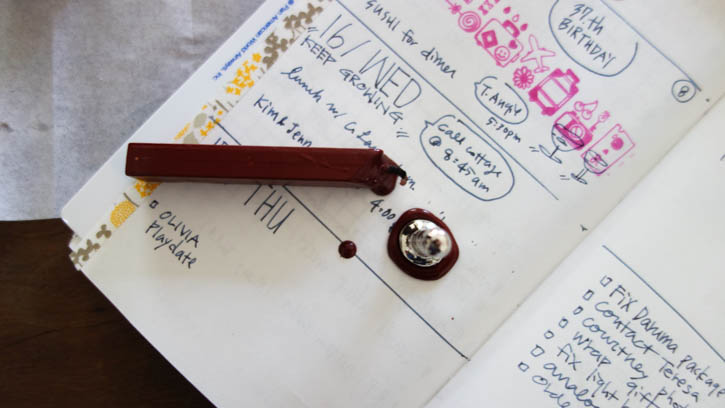
7. Of course... wax seal party won't be complete without putting some seals on our Traveler's Notebook, right?